

Here is the shirt. I had already cut off one sleeve before I remembered to take a picture. But you can't really tell, can you? So go ahead and cut off those sleeves. Don't cut both thicknesses at once, just snip into it and then stick your scissors in and follow the seam.

Now you want to cut off the collar. Use a straight edge to cut off the top of the shirt.


Cut all the way down the side seams. Then you can cut off the old seam so your new seams won't be so thick.

I had a little bit of the back yoke left and you don't want that, so cut it off.


My shirt had a pleat in the back, so I used my ripper to rip out those stitches.


I cut off the old sleeve seams, but it really wasn't necessary. You'll get rid of them when you trim your seams.

Now make sure the buttons are all buttoned up and lay the front fabric on top of the back fabric. They won't line up perfectly, but that's okay. Just do the best you can to keep both pieces straight across (matching grains).

Here's how mine looked. The points of the underarms didn't match up, but it doesn't matter.

Now pin the sides in as straight a line as you can and sew your new seam. Do the same on the other side. You want to be as perpendicular to the bottom as you can so your seams won't curve or slant. They're hard to steam open when they're not straight up and down.

You'll have a huge seam allowance in some places where the fabric at the bottom is wider than the top. Trim it to about 5/8", but don't worry if it's not perfect. You can use only the bottom part of the fabric if you want and it will work out a lot straighter and you can preserve more of the fabric for a fuller skirt. I used the top because I wanted to keep the little pocket that was on the original shirt!

Now turn down the top edge and sew it under a little less than half an inch. Make sure you're not hitting a button. You might want to trim the top to make sure that your skirt top starts with a little space in the placket and not a button!


I stopped sewing here so I will have a little space for the elastic to go in. I trimmed my seam very close for an inch or two from the top so it wouldn't get in the way of the safety pin going through the casing. Trim both seams close. It makes things a lot easier!
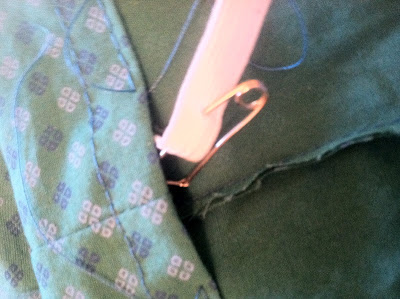
Stick a safety pin through your elastic so you have something to hang onto as a guide to pulling your elastic through the waist. Don't pull it all the way or you have to start all over! You want two ends to sew together. Do this with a needle and thread or use the machine. It doesn't matter which. Just make sure your ends are secure and that the elastic isn't twisted.


Stick a safety pin through your elastic so you have something to hang onto as a guide to pulling your elastic through the waist. Don't pull it all the way or you have to start all over! You want two ends to sew together. Do this with a needle and thread or use the machine. It doesn't matter which. Just make sure your ends are secure and that the elastic isn't twisted.

Now cut off the bottom to a length you like. You want the back of the skirt to be a little longer than the front to allow for butt stickoutage. Turn up the bottom edge a little bit and sew, then turn up an inch or two for a hem.

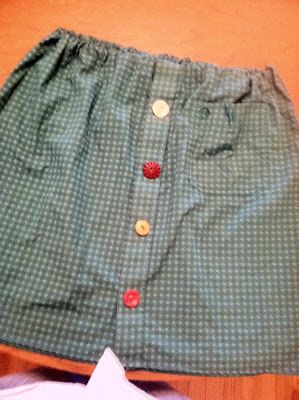

Here's how it should look. See how I left room above the first button? And I pulled the back up a little higher than the front before I cut off the bottom to make sure it hangs right when my butt is in there!

I cut off the original buttons because they were boring. I got some brightly colored buttons out of my button jar and sewed them on in the same places where I cut off the old ones. You don't need to really use the buttons to get your skirt on, so it's okay if the buttons are bigger than the button holes. I kept the button on the pocket because I want the pocket to remain functional.

Here it is on me. (Sorry, my sons don't like taking pictures for me so I couldn't be picky about quality!) This was a neat learning garment. Not sure I will ever actually wear it, but I did figure out some things that I will do next time to make a skirt that I will really like!
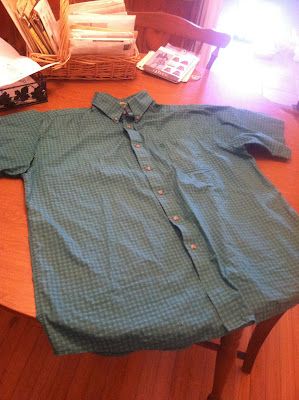

And here's how it started out again.
Afterthoughts:
1) My church's clothes closet sells every article of clothing for 25 cents, so I can make a skirt for a quarter! I could use two coordinating shirts and use one for a band around the bottom or contrasting front pockets. Goodwill organizes shirts by color, so you will have all the best combinations already there for you, but don't limit yourself. I'm in love with the idea of a sage green print with a solid black band. Beware that Goodwill is not cheap anymore.
2) Look through catalogs to find skirts that you like before you start and copy them. Then you won't end up making a skirt that seemed like a good idea at first, but that you really don't want to wear.
3) The next time I go to the clothes closet I will look for corduroy shirts so I can make a skirt to wear in winter. Plaids are cute, but be careful not to get something that looks too "school uniform."
4) The bigger the shirt, the more fabric you get and the price is the same! Get a huge shirt and you can cut off the placket and seam the two pieces together and use the front of the shirt for the back of the skirt. I don't see why you couldn't make a waistband and put in a zipper if you want! But you'd end up spending money on a zipper unless you have some stashed away.
5) The sleeves from a short-sleeve shirt would be perfect for side pockets. If I find some corduroy I want to try this. You might be able to use long sleeves for something else like a waistband or yoke.
6) The ugliest men's shirts can be the prettiest choices for a skirt. Hawaiian shirts often have no back yoke and therefore yield more fabric. Buy a big one! And don't worry about a frayed collar - you don't want the collar anyway. Missing buttons are no problem, either, if you're going to replace them with better ones.
7) Think of your thrift store or hand me down bags as a huge and inexpensive fabric store. It's fun! Next you'll be redesigning women's dresses. Buy the big ones!